- For the Chinese version of the level, see Lost City - Day 12 (Chinese version).
- For the Chinese version of this level before the v1.8 update, see Lost City - Day 12 (Chinese version: pre-1.8).
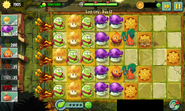
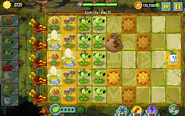
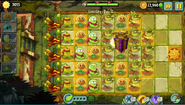
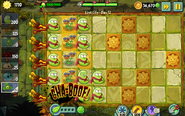
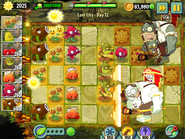
Lost City - Day 12 is the 12th level of Lost City in Plants vs. Zombies 2. This level has one objective, and that is to produce at least 5000 sun. Lost City's variation of Gargantuar, the Porter Gargantuar, is first introduced here. It has three flags. There are 13 Gold Tiles in this level. When this level is finished for the first time, the player gets a Lost City pinata.
Difficulty[]
- Producing 5000 sun will not be difficult even if the player sticks to the beginning columns for planting sun-producing plants. However, it is still advised to plant on as many Gold Tiles as possible (which are plentiful in this level) as their sun also counts to producing 5000 sun.
- In fact, the number of Gold Tiles in this level should make the player worry less about plants on them getting killed and therefore losing sun - practically paradoxical to the objective of the level.
- The real danger of this level are the fast-paced zombie attacks. The level starts extremely quickly. After the first Conehead Adventurer Zombie dies, a horde of zombies will approach, including Parasol Zombie and Bug Zombie. A horde of Imps approach at the beginning, similar to Temple of Bloom. The waves only get bigger, and the first Gargantuar appears relatively quickly. Two more Gargantuars appear in the last wave.
Waves[]
- The small number next to the zombie icon means that zombie will always appear in that lane, with 1 being the topmost lane and 5 being the bottommost one.
| Waves | Non-dynamic zombies | Ambush zombies | Note(s) |
|---|---|---|---|
| 1 | None | ||
| 2 | None | ||
| 3 | None | ||
| 4 | None | First flag. Carries 1x Plant Food. | |
| 5 | None | ||
| 6 | None | ||
| 7 | None | Carries 1x Plant Food. | |
| 8 | None | Second flag. Carries 1x Plant Food. | |
| 9 | None | ||
| 10 | None | ||
| 11 | None | Carries 1x Plant Food. | |
| 12 | None | Final wave. |
Strategies[]
[]
- Created by Insert Your Name Here
- At the start, quickly get enough sun to plant two Sweet Potatoes at the two sun tiles in the fifth row. This will allow you to take care of the ensuring horde much more easily, as you will only have to build up firepower on two lanes as opposed to five. Use Chard Guards to protect the potatoes, and Sap-fling to further slow the horde.
- Use Laser Bean to defeat the horde, as their attack pierces through all enemies. Only stun Excavators early on if they start at the second or fourth lane - Chard Guard will always be able to push them back if they start at the other lanes.
- Boost 2 Laser Beans to defeat the Gargantuars and their Imps. For the final round, if you still have trouble gathering the needed suns, try to save an Imp and stall it to buy time.
[]
Created by Toadstool33
Required plants:
Note: It is recommended that if you use Sunflower, that you boost it.
- Plant the Sunflowers in the 2nd column (the one with 4 Gold Tiles). If you are using Moonflowers, place them in the 2nd and 3rd columns.
- Use a Potato Mine on the first Conehead.
- The goal, if you are using the boosted Sunflowers, is to spam the lawn with them. It doesn't matter if they get eaten, this is just to make large amounts of sun. If you're using Moonflower, I recommend it being at least Level 3.
- The back column should be filled with Red Stingers; the 3rd column with A.K.E.E.s.
- Use Blover to blow away Bug Zombies. You should wait until they almost reach your house, so the Blover can also affect new Bug Zombies coming on.
- Keep planting Red Stingers and A.K.E.E.s wherever you can find room. The more power, the better.
- For the Gargantuar, use Plant Food on Red Stinger and Potato Mine.
- Try the same strategy on the final wave. You can also use Cherry Bomb/Grapeshot. Make sure that you dig up all plants that are damaging the Flag Zombie, so you can stall it with a Wall-nut. This gives you extra time to make sun if you need to do so.
[]
- Created by David The Superior
- Plant the Sun-shrooms starting from the fourth column so that the main assault is not destroyed by hordes of zombies. You can place Sun-shrooms in the third column for more Sun.
- When the Conehead appears, plant a Homing Thistle on a Gold Tile, since it can shoot the zombies closest to the house.
- Blover/Hurrikale is needed for the Bug Zombies, since it can kill both the bug and the zombie held by the bug.
- The only way to defeat the Excavator Zombies is Ghost Pepper, Lava Guava or Homing Thistle if placed correctly on the lawn.
- The first Porter Gargantuar appears very early, so get the Ghost Pepper-Lava Guava-Stunion combination to stun him and deal damage over time until you place some Dandelions to attack. If you want, use Blover for the Imp, but it will blow up to two Dandelions seeds on-screen (on-lane if you have two in the same lane), dealing damage to zombies from adjacent lanes.
- Dig the Ghost Peppers for refund. You will be able to get 35 (55 if Shovel Bonus is purchased) sun back for more attacks.
- It is favored to place Homing Thistles on the first and fifth lanes and the Dandelions on the second to fourth lanes for an amazing effort. Ghost Pepper and Lava Guava are for extra Damage and Stunion can be used to stall Excavators and zombies close to your main assault.
- The Final Wave will be easy as your defense might be strong if well planned. You still need Ghost Pepper/Lava Guava/Stunion to deal more damage to Gargantuars. You might reach the goal if you have at least a column of Sun-shrooms protected by chance.
- If you have the eighth seed slot, use Imitater (favored on Sun-shrooms for more sun) or take another plant by your choice (E.M.Peach if you do not want any eighth plant)
- If you are not at the goal yet and you have a Gargantuar left without the Imp, try dig the Homing Thistles and the Dandelions that can attack him and try to plant a many Sun-shrooms for the goal and use Stunion with Hurrikale to stall him until you reach the goal.
Gallery[]
Walkthroughs[]
- *: Removed ~: Epic Quest

