- For the old Chinese version of the level, see Ancient Egypt - Day 11 (Chinese version: pre-1.8).
- For the current Chinese version of the level, see Ancient Egypt - Day 11 (Chinese version).
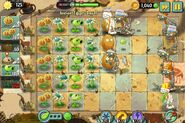
Ancient Egypt - Day 11 is the eleventh level of Ancient Egypt in Plants vs. Zombies 2. It is a Locked and Loaded level. This is the first Locked and Loaded level of Ancient Egypt, as well as the intended first of the game. To complete this level, the player must survive the zombie attack with the given plants. When this level is finished for the first time, the player will receive a Mystery Gift Box.
Dialogue
(Penny appears)
Penny: This level is a locked coordinate in time.
Penny: You must take these plants to win.
Penny: Otherwise you risk distorting reality.
Crazy Dave: Never distort reality! You'll pull something.
(Crazy Dave and Penny leave)
Difficulty
Since this is a Locked and Loaded level, the player cannot choose their own plants. However, the plants chosen are quite useful. For one, two sun producers are given, one of which the player has not unlocked yet, being Twin Sunflower. This makes sun production a non-issue.
On the other hand, while the offensive plants given are not very powerful, the zombies aren't either. Additionally, Potato Mine can take out the tough zombies like Buckethead Mummy. Wall-nut is also given, which blocks the zombies.
Tombstones are not much of a concern, as there are only four of them, far out in the lawn, and since Tomb Raiser Zombie is not present, no more can spawn.
Waves
- The small number next to the zombie icon means that zombie will always appear in that lane, with 1 being the topmost lane and 5 being the bottommost one.
| Waves | Non-dynamic zombies | Ambush zombies | Note(s) |
|---|---|---|---|
| 1 | None | ||
| 2 | None | ||
| 3 | None | ||
| 4 | None | ||
| 5 | None | ||
| 6 | None | ||
| 7 | None | ||
| 8 | None | First flag; 1x Plant Food available | |
| 9 | None | ||
| 10 | None | ||
| 11 | None | 1x Plant Food available | |
| 12 | None | 1x Plant Food available | |
| 13 | None | ||
| 14 | None | 1x Plant Food available | |
| 15 | None | ||
| 16 | None | Final wave; 1x Plant Food available |
Strategies
- First, collect two falling sun which could afford a Twin Sunflower and a Potato Mine to kill the first zombie.
- While planting a column of Twin Sunflowers, kill and stall the first few zombies with Potato Mines and Wall-nuts.
- Once you have finished your sun source, start planting Bloomerangs in the second, third, and fourth columns.
- Plant Wall-nuts while planting Bloomerangs to protect them.
- Also, try to use Peashooters behind the Wall-nuts, damaging zombies while stalling them.
- There is no need for the Sunflower, since the Twin Sunflower works instead.
Strategy 1
- Created by Ballistic Planet
- Start by planting Sunflowers in the back column, getting Twin Sunflowers just after them in the second column. Stall the first few zombies with Potato Mines.
- Start setting up Bloomerangs in the third and fourth column. At the same time, invest into Wall-nuts on the sixth column.
- Fill the fifth column with more Bloomerangs.
- Start replacing the regular Sunflowers with more Bloomerangs. If Wall-nuts get eaten, replace them when you can. If the going gets tough, Plant Food can be used on struggling lanes. The setup should look like this:
Gallery
Trivia
- This is the first Locked and Loaded level in the game. However, the player can still play other Locked and Loaded levels before this one if he or she obtains a World Key and uses it to unlock another world.
Walkthrough
- *: Removed ~: Epic Quest


